
Introduction
I completely missed the Olympus DSLR era originally. At the time I was looking, the 2 top contenders in the early 2000s for digital for me were Nikon and Konica Minolta. Having gone with Nikon at that time, I had not started to explore and experiment with other systems until now.
I’ve always heard good things about Olympus and being into the older CCD style sensors, I decided to start looking for some good deals. Not wanting to get something “usual” or “normal” I had great interest in the Olympus E-300, with it’s side ways penta-mirror system and range finder styled body.
Patience paid off as I was able to get a full E-300 dual lens kit from eBay for $135.
Without further delay…let’s get into this review, shall we and see how I feel about this vintage DSLR from the early 2000s!
Disclaimer – sample images represent was is possible to get from this specific camera and lenses used. The images are not straight from camera JPG and have most likely been post processed in Lightroom or other software to get them to the vision I wanted.
Tech Stuff
Body
Picking up this body, you feel the quality construction right off the bat. There is some plastic here, but the solid feel of it lets you know there is metal here as well. It has a flat top and not a prism hump like other DSLRs. I like the design and think it is unique.
Dials. There are 2 dials on the camera, both on top. A mode dial and right behind it a command dial.
Buttons. There are a lot of buttons with a D-Pad setup on the rear plus a whole bunch more for changing settings you’ll most likely need often. The power switch sits to the right of the mode dial and not around the shutter release like other cameras.
Shutter Release – The shutter release has a positive feel between activating the auto focus and actuating the shutter. It has an almost springy feel down to focus actuation, then a positive stop. You can feel a positive click between when focus is activated and then just a little more pressure gives you an actuation of the shutter. I had no problems adjusting to it and did what I needed when I needed it.
Rear LCD – It has a decent size display for the time and somewhat small by todays standards.
Flash
This camera does have a built in flash. It sits right in he middle of the body
Viewfinder
The viewfinder is an optical finder with 95% coverage. It does the job. The shooting info is at viewfinder right and not at the bottom like most other cameras.
Weather Sealing
Honestly not sure about the weather sealing on this camera, but given it’s status at the time, I’m sure there might be some…but I do not intend on bringing this into a downpour. I do think it would be hearty enough to handle a little sprinkle or snow.

Lens Line Up
Given that the Four Thirds system did not live very long there are not a lot of lenses for the system. When looking for an E-300 deal, I wanted to get one with a lens so I could be up and running quickly. I lucked out and was able to get the E-300 dual lens kit which comes with the Olympus 14-45mm f/3.5-5.6 and the 40-150mm f/3.5-4.5.
In all honestly, the kit lenses are actually very good. I might try and find some other lenses, primes and such to experiment with – but I find the current kit lenses I have are pretty comparable to the Minolta A-Mount lenses I have and I’ve been very impressed with those!
The lenses themselves are rather bare bones regarding features. No switches, just a manual focus ring and a zoom ring. Aperture is electronically controlled so no aperture ring.
Both lenses have the lens hoods and they connect and disconnect in a positive fashion without fear of them falling off.
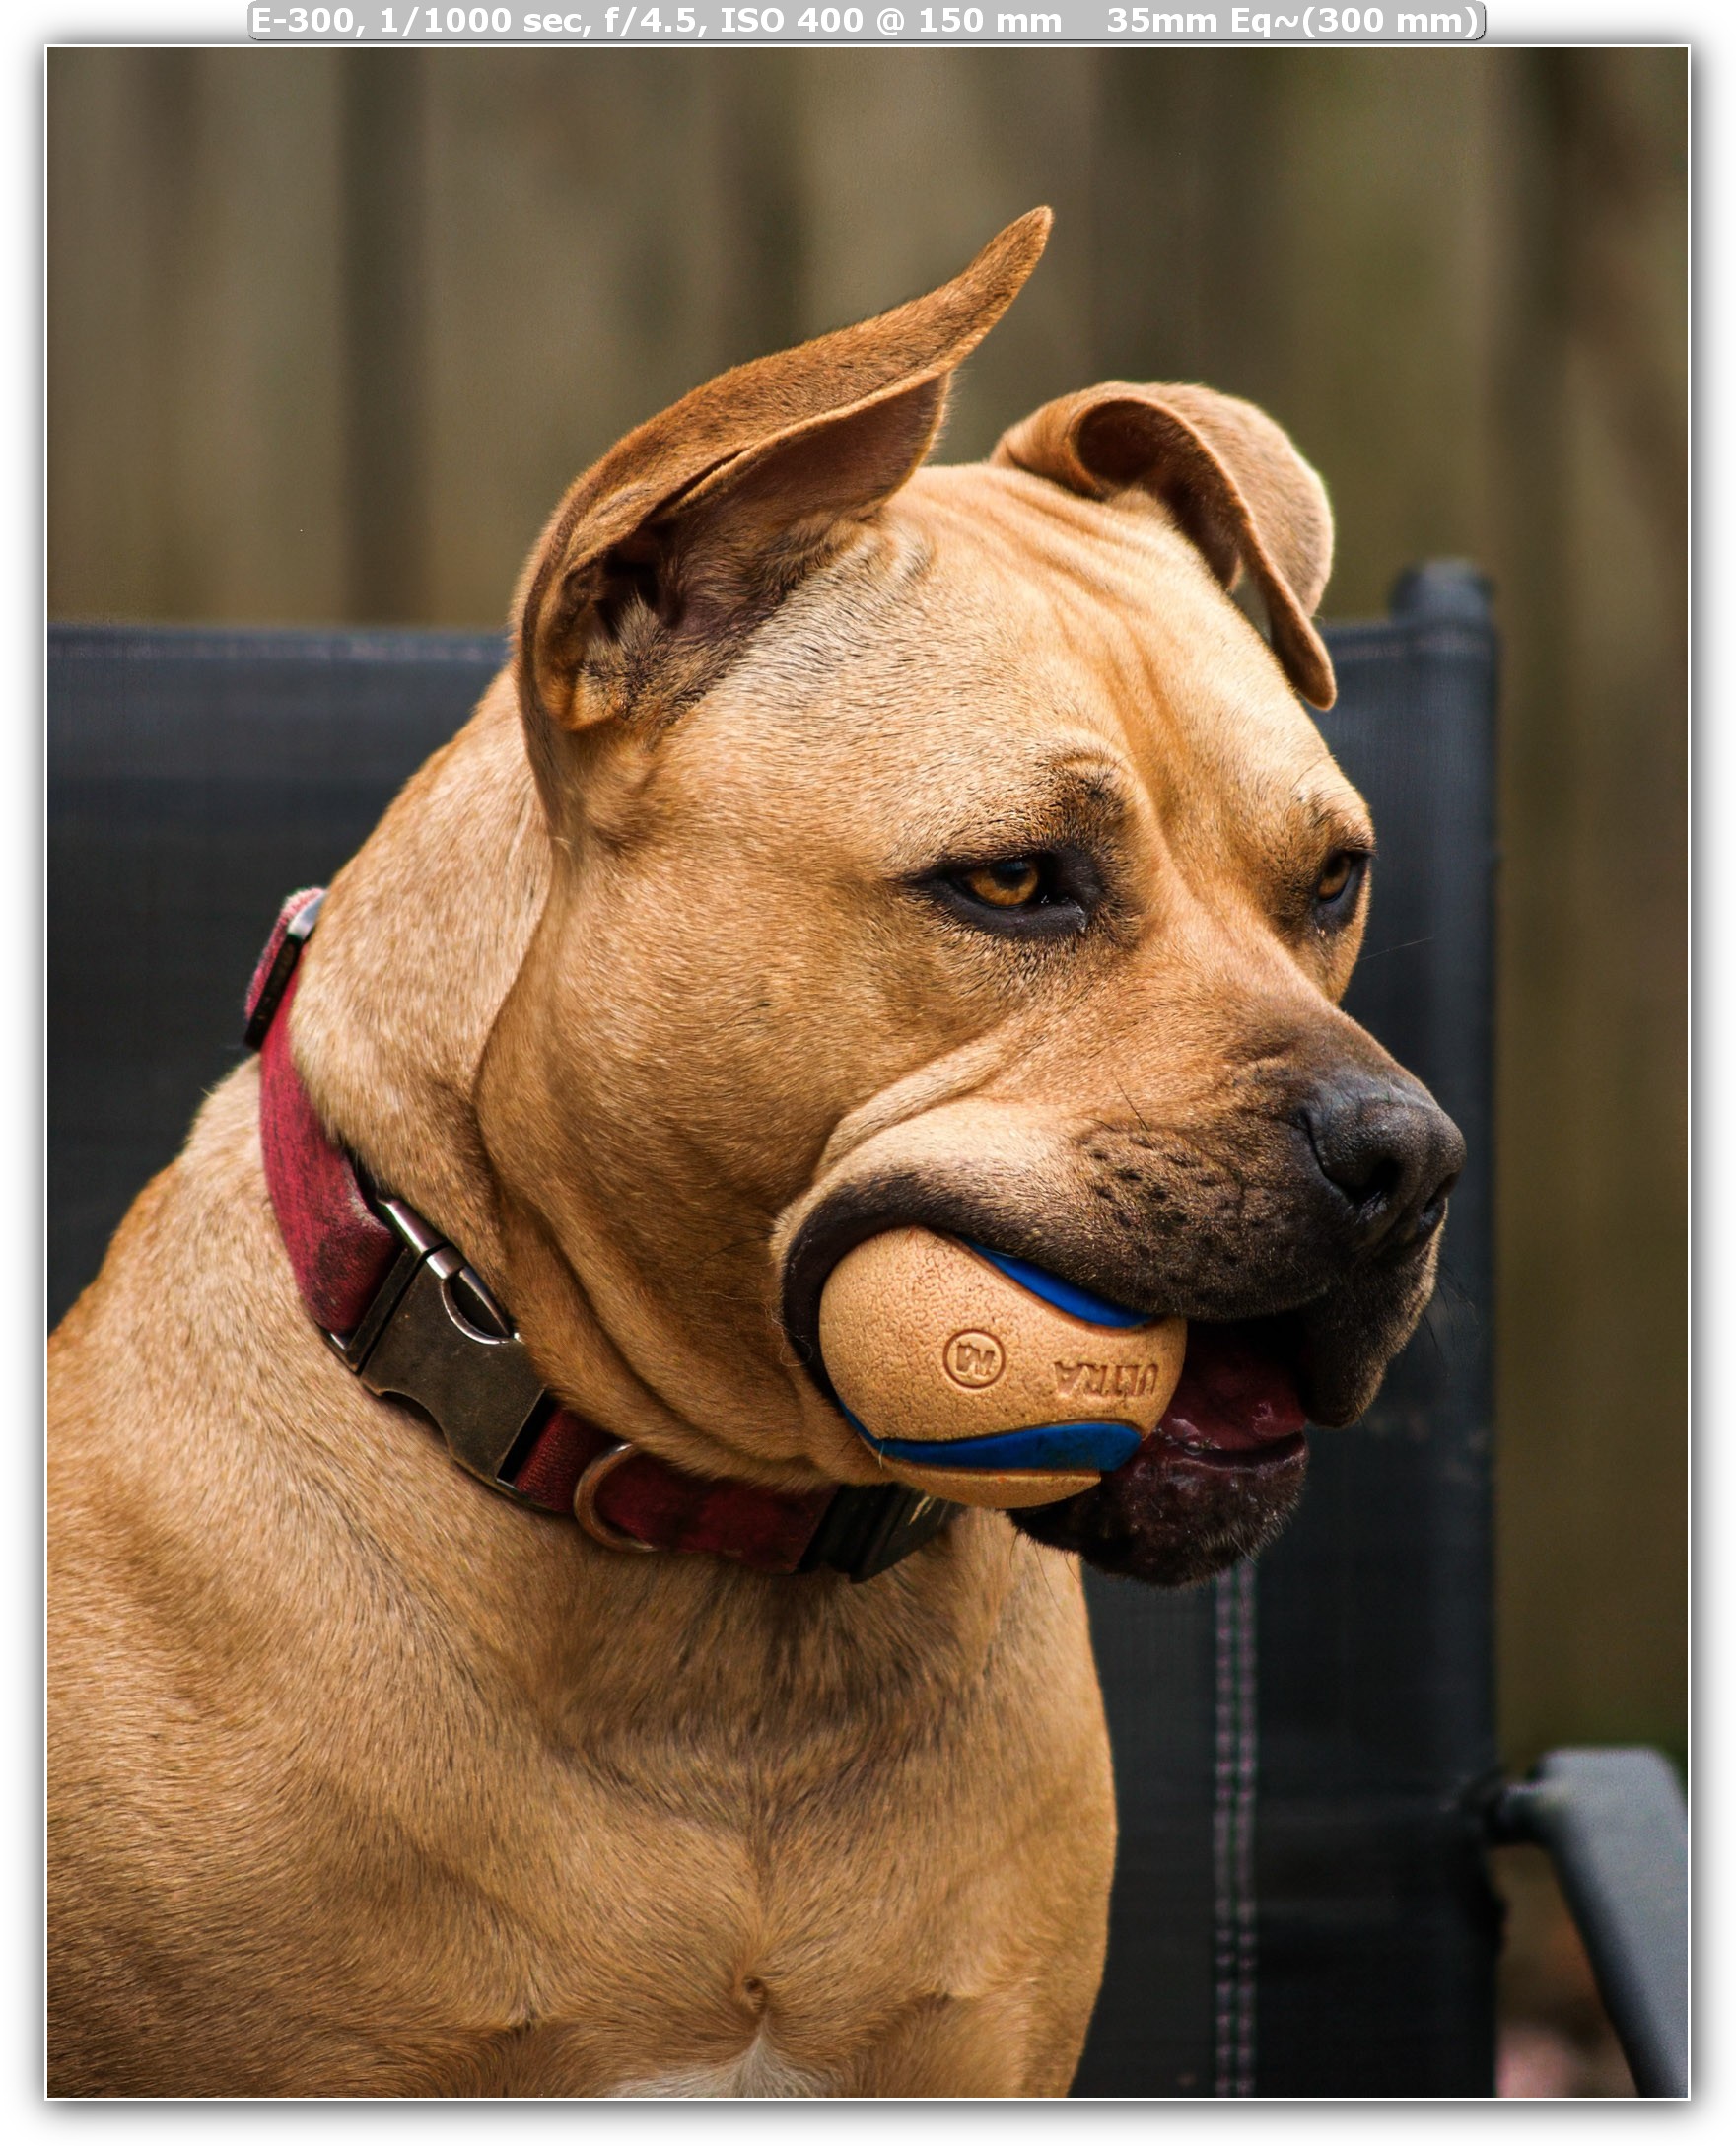
I find both of these lenses quite good optically. Even shooting wide open apertures, sharpness – contrast – color are all very good. Stop down a little end everything gets a bit better…but if you want to shoot these lenses wide open, you can and still have great IQ! Even the bokeh is very nice on these lenses!

Performance
Overall System Performance
This camera was released at the end of 2004. Even with that, the performance is comparable to the Minolta Maxxum 7D. Jumping into menus, power on times are all very fast.
Autofocus
AF Point Selector
The E-300 has 2 modes, one where you pick the AF point and another where you let it pick one of the 3 linear auto focus points. I just decided from the get go to use the middle as it is phase detect and can do vertical and horizontal lines for focusing. Not a stranger to the focus and recompose method – that works well for this camera too!
Continuous
More testing here is needed, but I’d think that if subjects are moving too fast, it may not be able to keep up. This would not be the first camera I would choose for that anyway.
Manual Focus
I will use manual focus on occasion, but not a fan of the implementation here. In order to engage the MF, you have to half press the shutter release and then the manual focus ring activates. That may have been because i chose the auto+MF mode. Focus confirmation is by checking the AF dot in the viewfinder.


Battery and Battery Life
When I first got the camera, it came with 1 battery. It does use the same batteries as the Olympus C-8080, which is the BLM-1. I have found the battery life of a camera at this age to be very good. I’ve mucked around with the camera and one battery for 3-4 days and no issues. Been out shooting for a few hours, left the camera powered on and still no sign of the battery being exhausted.
If you have read my older reviews of the Minolta Maxxum 7D, you know that I love that camera, but one of the things that is not so great on it is the battery life. I usually, if shooting for a full day, will take 2 additional batteries with that camera. The E-300, I think I may be able to get through a full day with just one!


Stabilization (IBIS/AS)
This camera does not have any stabilization and neither of the lenses that came with the kit have it either. Some of the camera bodies that came after this one did contain what Olympus called iS (image stabilization).
I will say that the AUTO ISO likes to stick with slower shutter speeds and low ISO, so having had IBIS or lens VR would have been welcome.


Ergonomics
For me, the size of a camera is important. There is a point of diminishing returns on size. You can only go so small before the controls are hard to reach and the camera is difficult to hold.
Feel in The Hand
I already mentioned that the camera feels solid. If a camera is too small it is hard to get to the buttons that are on the camera body. This camera feels very good to me for what it is. The grip is OK, but not one of my favorites. My pinky finger does occasionally fall off the bottom of the camera.
Another thing and probably a nitpick of mine is the vertical rubber protrusion that just doesn’t feel natural to hold.
Even with all that, the grip is sufficient for me to be able to hold the camera with one hand with the 40-150/3.5-4.5 attached – fine in either portrait or landscape orientation.


Image Quality
Coming from Olympus m4/3, I had high hopes for this camera. Also, had some high expectations based on other reviews and past experiences with older CCD sensor cameras from the same era.
Olympus does a great job here and the images are very nice, from JPG to RAW – you have a lot to like here if the older sensor CCD is your jam!
Colors are very nice. Good amounts of saturation without being over done.
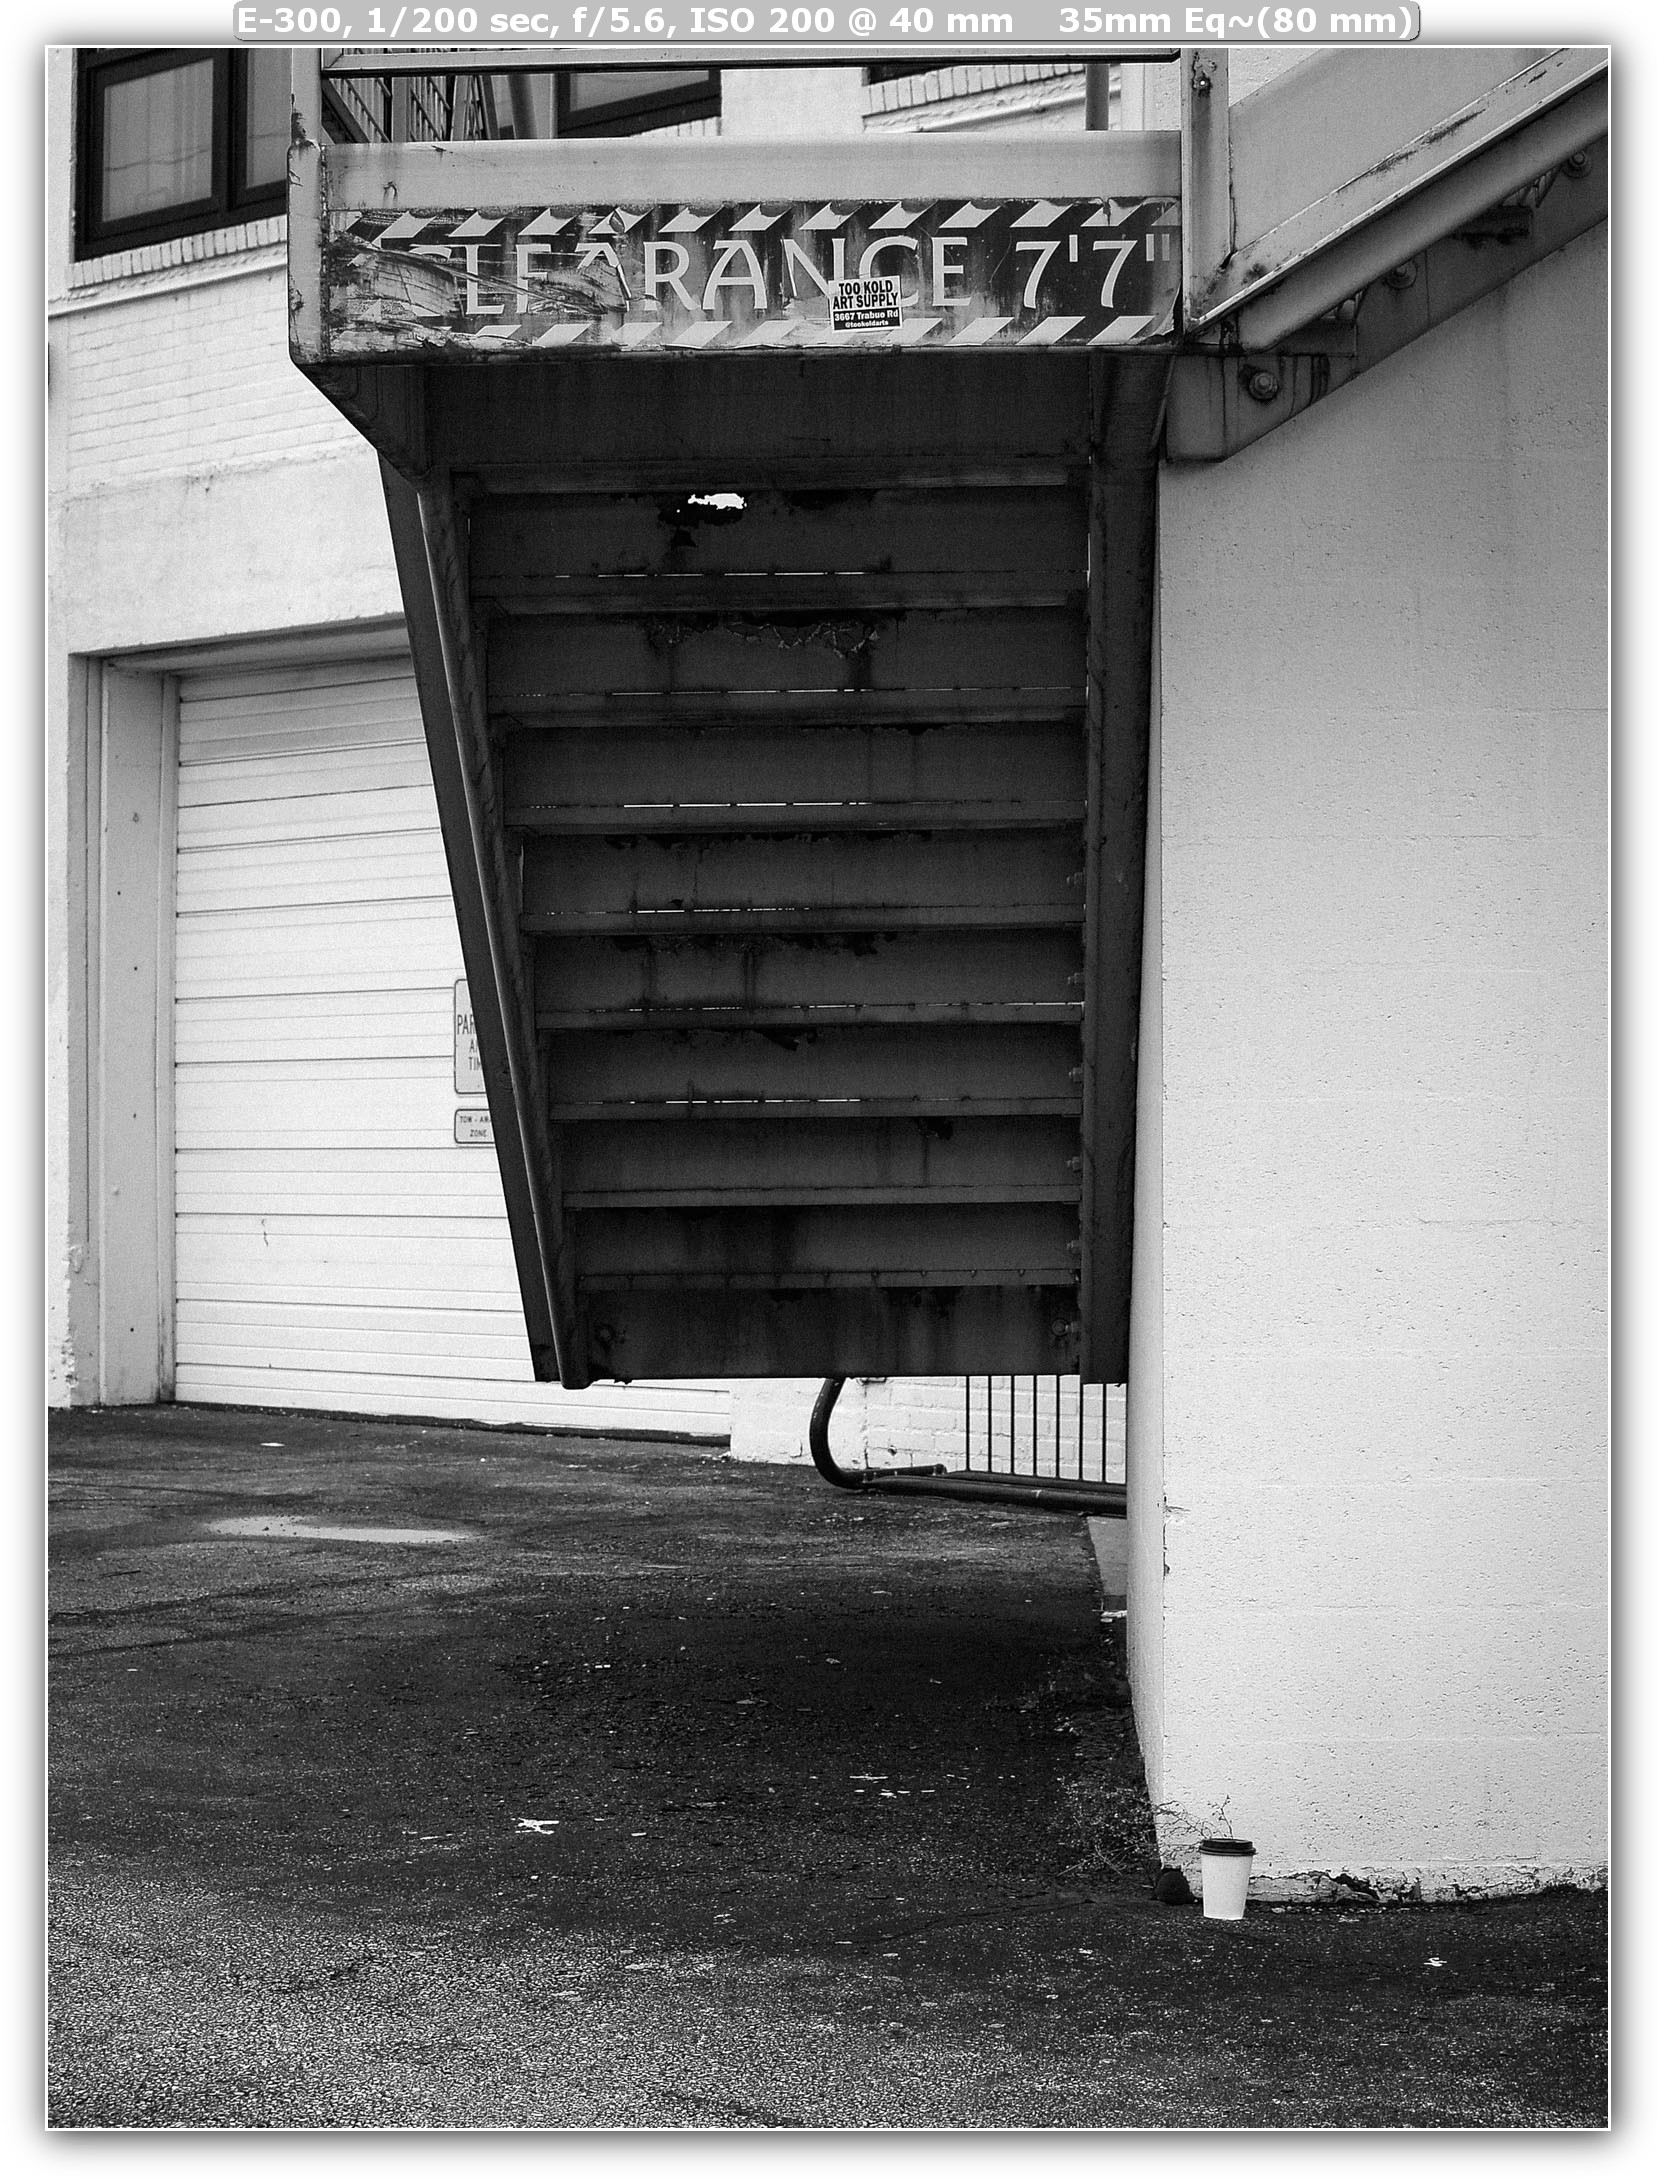
There is even a monochrome mode where you can shoot in camera black and white, adjust the sharpness and contrast as well. Images in this review that are monochrome were shot in camera with a small amount of exposure tweaking. I did also add a -20 vignette and a +30 grain adjustment in Lightroom.
Bottom line is that everything I like about the Minolta Maxxum 7D can be said for this setup as well.
Even higher ISO, and this camera can go up to 1600 is passable with modern post processing techniques. I use Lightroom and noise/sharpening plugin called Topaz Photo AI when needed. Most of the time, I never really need to call that plugin and can use the settings from Lightroom.
My post processing for the E-300 is very similar to my Micro Four Thirds presets, so that is very convenient!
As I always do, please check out the images in this review and decide for yourself what you think of the image quality. What do you think of a 20 year old DSLRs capabilities?


Final Thoughts
I was happily surprised at just how much I really liked shooting with the E-300 dual lens kit. The camera is very responsive. The excellent battery life is a plus!
The standout though is image quality and colors. Between the Kodak CCD and Olympus Color Science – this is a winner!
With only a small issue with the feel of the grip and the fact that the four thirds DSLR system was not around long limits the number of lenses that are available.
Even so, if you just need the basic zooms and a few primes, you can get all you need here and for not a whole lot of money.
Final Verdict = Recommended!
